


Introduction
I know that Next js making updates very often and all the tutorials going obselete day by day, This article mainly focused on setting up Redux/toolkit with Next.js App router. You can follow along and copy paste the code, you will be able to setup your redux store successfully, this will be the last article on how you can set up redux/toolkit on Next.js App router.
Happy Coding!
Installation
If you are starting a fresh Next project, create your next app first,create-next-app your_project_name
Now install the redux/toolkit and react-redux as dependencies.npm install @reduxjs/toolkit react-redux
Boom! Now, you have the super power of redux toolkit to manage your states.
Folder Structure
Folder structuring will be very helpful to organize the slices, you can only solve the real world problems rather than searching for your files and folders. See the below to get a idea how you can make the folder structures, This is from the official redux documentation.
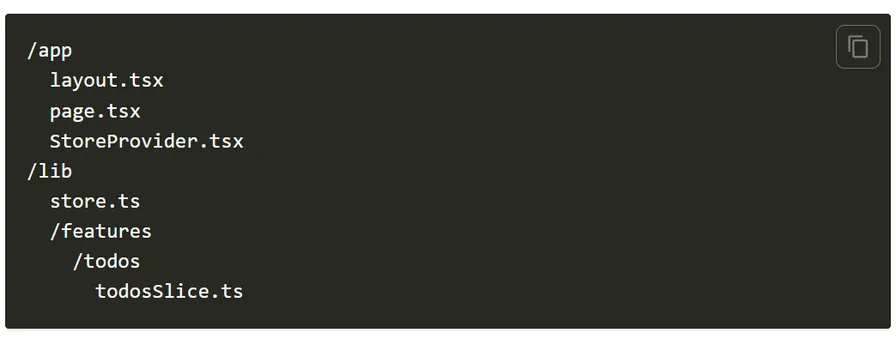
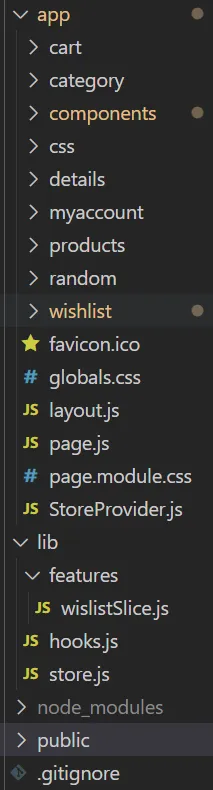
I have also used the same structure in my project as well, you can see that as well below.
Creating your store
After successfully creating the folders and file we can start writing some real codes.
lib/store.js
Now we have successfully configured our store.
lib/hooks.js
Let's use the imports with new naming conventions throught our app.
Providing the store
Lets create our StoreProvider.js to be used with the Provider component given to use by the react-redux.
StoreProvider.js
Make sure that you mark this file as "use client" at the top since redux/toolkit is a client side thing, i.e it only works on the browser on the client side and doesn't have any connection with the server.
app/layout.js
Now we can wrap the whole app of ours by wrapping the body tag. This will make the store accessiable everywhere from the store and all our states will be centralized.
title:'Create Next App',
This is it, now you can go to your features folder and create wahtever reducers and actions you want.
Calm down, Wrapping the layout.js by a client a component doesn't make the whole app client side!.
We already know that we can wrap our App.js file in React.js with the Storeprovider and we don't have to care about the client components and server components, but here yes, you have to concious about what you are doing or you might end up making your whole next app as client side,
if you wrap the server component by client component the right way it won't make the server component a client side component, for further reference and clarification I am giving a link to a youtube video.
link - https://youtu.be/nYEoxne_20Y?si=-lsIwef4xgOl2WNi
By using the above approach, i.e {children} our whole app will be still in server side even though we wrapped it inside a client component.
Slices
lib/features/wislistSlice.js
This is a small example of how you can you create a slice, create slices of your own.
Addons
You should make the component client side wherever you want to use the useSelector and useDispatch since it is from react-redux and we use redux only in the client side.


